Sunday, December 31, 2006

Visions of blue


Fellow quilt guild member Jan brought a stack of blue-and-white pieced blocks to our monthly meeting back in November. She'd won them in an online swap. Pretty as they were, she didn't have an immediate use for them. Might they be useful in the guild's current community service project -- making lap quilts for residents of the local county nursing home?

"Absolutely," I told her. And I tucked them away in my sewing room for when I had a chance to do something with them.

Yesterday, while making good on my pledge to reorganize the sewing room, I ran across them. And it was the perfect time to stop everything, pull some marbled fabric out of the growing stack of blues, shove aside other stacks on the cutting mat to make some sashing strips, and get busy sewing. Just a short time later, Jan's blocks had become a great-looking quilt top.


My favorite block of the batch has a lovely Dresden look to it. Didn't the original quilter do a great job leaving a perfect quarter-inch seam allowance around all those points? The sashing framed it perfectly, and I love the thought of an older lady admiring the charming teapot in the middle.
In January, the guild plans a Saturday Sew Day when we'll layer, pin, baste, quilt and bind this quilt and a lot of others. We hope to have enough finished to make a nice donation to the nursing home.
Thanks, Jan, for a great contribution - and we'll never know who made all the blocks, but it's great to think about how a little effort from a lot of quilters will bring a lot of cozy comfort to someone who could really use it.

Saturday, December 30, 2006

Quilting in the news - Chicago

Here's a neat news story about a volunteer quilting program in Chicago, fueled by an interior designer who found herself awash in discontinued fabric samples.

Be sure and check out the video version, which tells the story more poignantly than words can...makes me want to head right back to my sewing machine, which I'm going to do right now!

Friday, December 29, 2006

Scrap yarn and hats


Turns out the unraveled granny square centers worked well for making skinny stripes around various baby hats. Between those scraps and a lot of other yarn odds and ends, I had several happy hours of knitting with no real plan at all. Here's how a few of the hats turned out.
Three more days before heading back to the office...so tomorrow I'm going to make nice with my sewing machine, which I think is feeling a little jealous of the knitting needles...

Thursday, December 28, 2006

A self-imposed challenge


I guess there was a time when making crocheted granny squares seemed like a good idea to me. Because when I was re-organizing my yarn stash the day after Christmas, I ran across a little bag filled with several dozen crocheted squares about an inch and a half across.
I know a lot of grandmas have made these afghans over the years, and bless their hearts for doing so, but you know what? Granny squares make lousy afghans. They've got big gaping holes in them, so they're not warm. Accordingly, they seem to have no sense of utility unless you want your couch to look like it's straight from the old set of "Roseanne."
So it's safe to assume that I will not, in fact, be converting these long-ago-started granny square centers into crocheted afghans.
Instead, I decided to challenge myself to see what else I could do with them. It's ridiculous, really, because there's not enough yarn in the whole batch to really worry about, and I could have tossed the whole bag and not lost a moment's sleep over it. Still, it seemed like a fun idea, especially as I'm working on this batch of baby hats for the hospital. I've used more than half of the squares already, and I'll post some of the results tomorrow.
I want to use up all the squares in the bag, but I've already subtracted three of them for another purpose. It seems that the charming Abigail thinks they make great cat toys, too.

Saturday, December 23, 2006

Have a merry little Christmas


These past couple of weeks have been too hectic with work to leave much energy for major sewing projects. So it's been the perfect time to pick up the knitting needles in the evening and make a few baby things. Here's how a couple of non-traditional yarns knitted up - I love them!

When I dropped off the "Santa Baby" hats at the hospital last week, I asked the volunteer office if the maternity ward had any special needs for other donated items. Turns out they don't get nearly as many hand-knitted hats as they like to have on hand, which really surprised me - often hospitals are inundated with hats because they're the first thing folks think of making. I figured the Christmas hats would come in handy as a quirky little thing this week, but I really didn't expect they would have an ongoing need for hats.

So I've been enjoying the chance to relax with some of these small, finished-in-an-hour projects, and have been using a lot of brights from my stash. I'll make some pastels, too, but it's fun to use something a little funky as well.

It's especially nice to be reflecting on these sweet babies during this special season of the holy Babe in the Manger. I wish you a very warm and wonderful Christmas.

Friday, December 15, 2006

When mistakes don't really matter

I broke one of my own rules this week.

The rule is this: Don't ever donate an item for somebody else to use that you wouldn't be perfectly proud to see on your own child or use yourself. In other words - don't turn out junk in the name of charity, because that's not charitable at all.

I still believe in that rule. But when my schoolteacher daughter called Wednesday night to tell me about a family with a lot of children who'd just lost everything in a fire, it seemed appropriate to recalibrate my internal formula of quality vs. utility.

I'd built up a fairly substantial box of stuff that was clearly not my best work. A knitted blanket in double-thick baby pastels, but too large and too heavy for a baby. Another in garishly bright yarn. A winter scarf that seemed a few stitches wider than it ought to be. A bunch of hats that were experiments for new styles and stitches - and close inspection revealed more than a few bungled rows and mis-aligned ribs.

I'm not a perfectionist in my craft work by any means. Still, I hadn't felt right about sending this stuff off to the hospital or the youth center. But it seemed a shame to let vanity keep a bunch of hats and blankets in a box in my guest room when they could, with all their flaws, be put to much better use.

So off the box went to Brooklyn yesterday - along with the little jester hat I completed on Sunday, and a flannel baby blanket a la my mother.

This family will need a lot more help getting back on their feet, but if the children have new blankets to cuddle with at night, I hope it'll help at least a little.

Monday, December 11, 2006

A little color, a lot of punch

For some reason I tend to hang onto tiny little balls of yarn. I mean, the size of a golf ball. Just left-over odds and ends. It's ridiculous. I have a grocery bag of them and I've been adding to it for years. Lately, I've been meaning to throw the whole thing out.

But yesterday I actually discovered a use for them.

I was knitting a child's cap on standard off-white yarn and suddenly decided to give it more of a ski-cap sort of look by adding a little color. I've never done much multi-color knitting, but alternating every other stitch didn't seem too intimidating, and the little balls of leftover yarn were all I needed. And before I knew it, I had this:


There was just enough yarn left over to make the pom-poms for the corners of this little jester hat. The idea came from a preemie-sized hat in Knitting for Peace, but I sized this one up to fit a four- or five-year-old. I have to say, it's the best use of tiny amounts of scrap yarn that I've found in a long time!

Sunday, December 03, 2006

Santa babies


Last week I read in Tracy's terrific blog, Wool Windings, about some adorable Santa Hats and matching booties she'd been making for The Preemie Project. Her sets were so cute I could hardly wait to rush to my stash and dig out a skein of Caron Red Simply Soft and start some for our local hospital. I didn't have any fuzzy white yarn for the "fur," so I picked up something called "Masquerade," part of the new line of yarns that JoAnn's has come out with. It's sort of chenille-y, with a little wisp of sparkly nylon - just right for the cheerful trim. Here's how mine turned out.

These knit up so quickly that it'll be easy to add to this little batch and get them to the hospital well before Christmas. Thanks so much to Tracy for the inspiration!

Thursday, November 30, 2006

Cat quilt completed


This goes to Carm today - just the right size for her cat carrier. The happy little cat print, I hope, will make a cheery backdrop for some kitties in need of a loving new home.

Sunday, November 26, 2006

A simple project for furry friends

Our friend Carm volunteers most every weekend with the Chemung County SPCA. She takes shelter animals to community festivals and retail stores, and chats with folks about the joys of animal companionship. Everyone always enjoys seeing the sweet cats and lovable dogs the Carm takes on these community appearances, and many a homeless pet has gone to a loving home as a result of her outreach efforts.

For some time I've been wanting to make Carm some sturdy quilted cushions for the animal cages she takes on her weekend tours, and for the pets awaiting homes at the shelter as well. I took the day before Thanksgiving as a vacation day, and found myself with a little time to make these:


Nobody wants to think of these animals as merchandise -- but the fact is, they do catch the eye of a potential new family if their cages are somewhat dressed up and not just lined with a newspaper or an old towel. So I had a lot of fun sewing these 5-inch squares together and thinking about the families that might be welcoming new pets into their homes.


The SPCA likes 18-inch-square cushions for their cages at the shelter, so that's what I made. The cage Carm takes on her weekly road shows is a bit wider and deeper than that, but we stacked the the cushions up yesterday and little Charlie and Jimmy didn't mind one bit. Their sister Lily watched from a distance, but soon all three of them were snuggled into a comfy corner for a nap.

Carm's cage measures 20 x 30, and we both liked the idea of the cushion curling up on the sides, like a padded bumper in a baby's crib. So I'll make her a 24 x 34 cushion and her little fuzzy friends will have a cozy place to nap. Of course, these cushions will stand up to many machine washings, too.

If you'd like to make cage cushions for your local shelter, be sure and call to check their preferred sizes. Some shelters will accept knitted or crocheted blankets, but the fabric seems to make a tidier liner with no potential for snagging on little claws. The five-inch scrap squares work very well for a simple patchwork. I used a high-loft batting I had on hand, but you can use old towels or worn mattress covers, too, as long as they're clean.

I backed the cushions with some leftover home dec fabric for extra sturdiness. For the edges, you can do the right-sides-together, stitch-around-the-edges-leaving-an-opening-and-turn thing. Or, leave your backing about an inch larger than the top, and fold it over to make a binding, machine-stitching on the top side. Make machine bar-tacks at each corner of the patchwork - no handwork at all.

A quick and easy project -- and one that can really help some deserving animals feel cozy as they get a whole new lease on life.

Tuesday, November 21, 2006

We can all knit for peace


I was in Barnes & Noble's last weekend, looking for a good book on felted knits. While I was hunting through the amply-stocked shelf of knitting books, another little jewel jumped into my hands instead:. "Knitting for Peace" by Betty Christiansen. Published just this year, it's a lovely compilation of ideas for community service crafting.

Not only does the author share wonderful profiles of many terrific organizations devoted to service projects -- she also includes all the sensible patterns we'll ever need. Simple, warm sweaters, vests, socks and classic hat patterns are all beautifully presented. I was happy to see The Ships Project featured, along with Warm Up America - accurately described as "the mother of all knitting charities."

"Knitting for Peace" is great reading and great inspiration at the same time.

Saturday, November 18, 2006

Some warm November knitting

Since the silent auction in September, I've mostly been making small gifts for various wonderful folks. An enjoyable-rib scarf in red Lamb's Pride for my friend Judith, who bravely left the security of her agency job and to go to graduate school. Another in black Paton's Brilliant for my daughter, who bravely teaches 21 first-graders in Brooklyn each day. Warm wool socks for my husband's mother, who at 84 still braves the Colorado snow to help her ailing friends get to the doctor and the grocery store. Some slippers for my nephew David, an Army medic recently returned to Baghdad, who's got all of us beat when it comes to bravery and honor.

With those projects caught up, I wanted to make a few children's hats for Maureen's classroom stash. I've slightly adapted Norma's Dulaan hat for more shaping at the top, and I really like the results. You won't believe how quickly these things whip up! And they're so thick and cushy, they trap a lot of air and will make little ears feel so snuggly and warm on a cold day. Here's how to make one for a middle-sized child:

Use two strands of any acrylic or acrylic/wool blend worsted weight yarn. On a 16-inch circular needle (size 13), cast on 42 stitches, place a marker, and join. Knit in stockinette stitch until piece measures about 8 inches long. Start your decrease rows, switching to DPNs as needed: K5, K2tog around; knit one row even; K4, K2tog around; knit one row even; K3, K2tog around, etc. etc. Continue decreasing until you've K2tog around, then break yarn and thread your tail through the remaining stitches, drawing tight to close.

Now you've got half a hat - and you'll pick up 42 stitches around your cast-on edge and make the same hat all over over again, letting it "grow" in the opposite direction. You'll end up with a weird-looking thing like this (about 21 inches long):


Then just punch one end in to fit inside the other. Tack the tops together if you want. Fold up a cuff, and you're done! (I did end up making a pom-pom for this one later, which was good mindless activity while watching the finals of Dancing With the Stars this week - way to go, Emmitt!!)

The interior of this hat measures about 19 inches around, but it's really stretchy - so it should fit almost any grade-school child or small adult with ease. Just add or subtract a few stitches to adjust the size. My gauge was 2.5 stitches per inch.

This hat is a great way to use up stash yarn in a hurry, and the results will warm your heart.

Saturday, September 30, 2006

Silent auction - a big success!

We had a great time at work on Friday afternoon with our department's silent auction to benefit United Way. Folks strolled through all day long, checking out the tables of great stuff we had on display and writing down bids. Handmade original jewelry was particularly popular. I had no idea so many of my co-workers were so adept at beading and jewelry-making -- it was a fun chance to appreciate one another's talents as well as raise some money for a good community cause.

I was happy that my quilted bags seemed to be a hit. Here's a shot of one of our two display tables, ready for eager bidders.


Here's a table runner I finished about 11 p.m. the night before. It actually came together quickly after I discovered three scrappy star blocks in warm reds and greens that I'd made for reasons unknown some time ago...


And here's the yoga bag that went along with Kelli's mat and personalized yoga lessons:


In all, we brought in nearly $1,700 to benefit United Way. Not the biggest fundraising event they'll have during the current campaign, but well worth doing - and a lot of fun for all of us.

Oh, and that purse I crocheted out of long strips of fabric? It didn't make it to the auction tables at all. In the end, I just didn't feel good enough about it to include it, especially when we had no lack of really nice items up for auction. I'll snip the red handles out of it and maybe sew the opening closed to make a potholder.

By the way, astute readers (who probably include my brother and two sisters) will notice I have changed the name of this blog to match the URL I chose when I set it up. I have no idea why I didn't have them match up from the very beginning, but anyway, it's done now!

Tuesday, September 19, 2006

Knitting with the stars


Sixteen inches complete on the silent auction scarf tonight... and lots of fun watching you-know-what-show!!!

Sunday, September 17, 2006

A bagalicious weekend

My sewing machine was smokin' this weekend, and it felt great. Well, it felt great for me. I can't speak for my hard-working Janome.


I made this bag for the silent auction. The design is from Cindy Taylor Oates' "Purses, Bags and Totes" -- which, by the way, I highly recommend. Great instructions, giving precise dimensions of fabric pieces to cut, and a few full-sized patterns included - none of this "enlarge 245%" business like in most books, which I can't help but find awfully annoying when I spot a design I'd like to start right away. This book is also the source of the yoga bag I made last week (there are a couple of minor errors in the printed directions, but it's easy enough to figure out the "oops" when you're in the process of construction.)

Then, inspired by some of the clever designs I spotted on the Bagaholics blog, I started this little bag in some luscious autumn prints I had on hand. I foundation-pieced the wedges right onto the cotton batting, then put some decorative feather stitching in gold thread along the seams to quilt the thing. I haven't decided what handles to put on it yet...sophisticated black or woodsy bamboo?

On the knitting front, I completed this set of mittens that I had intended for my daughter's classroom supply. They turned out adult-sized, not first-grader sized -- but the wool/acrylic/mohair mix made them nice and soft and surprisingly great-looking. So I decided I'd add them to the silent auction, too, especially if I can get a scarf finished to go with them. I will probably start the scarf Tuesday night during "Dancing With the Stars" -- which, by the way, is absolutely the most entertaining television show to ever have been on the air, EH-VER.

I just have to hope that I won't get so excited watching Emmitt Smith dance that I drop a stitch... but that's a chance I'll just have to take.

Saturday, September 16, 2006

Bags, hats and such

Haven't had much time to blog lately -- have been consumed by an energy-zapping project at work, so I've just been sewing in little bits and pieces here and there. I did manage to finish a yoga bag for the silent auction, but unfortunately forgot to snap a photo of it before I gave it to the yoga-instructing co-worker who's giving yoga lessons (and a mat) for her silent auction contribution. It did turn out great, so maybe I'll remember to photograph it at the auction later this month. I have about three other bags in various stages of completion at home -- with the best of intentions of finishing them tomorrow...we'll see!

I've been doing just a bit of knitting, too, and discovered a terrific pattern for a child's hat. Check it out...the Dulann Hat on Norma's blog. The key is the bulk -- double strands and double thickness trap a lot of air, the key to keeping the noggin warm, so even acrylic yarn will work nicely. With my daughter teaching first grade in Brooklyn now, I knew I had to churn some out for her to keep in her classroom stash. Here's a shot I took of one of the hats, in situ at P.S. 58 before the start of school last month.


I've been thinking about making something similiar in adult sizes, using a more sedate yarn. My only question was whether the bulk would just look dumb. But I think nothing could look as dumb as this $325 Marc Jacobs mushroom hat I spotted in the window of Barney's in Manhattan!


Saturday, August 26, 2006

Survey says...

Well, the purse crocheted out of torn strips of fabrics got the thumbs-up from my co-workers for inclusion in the United Way silent auction ... but just barely.

Kelly said "absolutely" -- she thought it was "fun" and she liked the handles (a tactful way of overlooking possible dorkiness of the purse itself?)

Anna was definitely enthusiastic, saying it had a bohemian, "hippie-chick" quality that would easily draw bids.

Most diplomatic of all was 22-year-old Christie, who listens to edgy music and wears hip, urban black most of the time. She looked thoughtfully at my crocheted offering, paused for a moment, and then said with heartfelt kindness: "I wouldn't buy it - but other people might."

Y'gotta love a kid who can come up with that sort of honest answer on the fly!

Tuesday, August 22, 2006

When crafts collide, I can't decide

The jury's still out on my most recent effort for the upcoming silent auction for United Way.

Well, OK, it hasn't exactly gone before a jury. But I definitely need to run this purse past some young, hip sorts to see if it fits into the "fun and quirky" category or in the Land of Eternal Dorkdom.

Here's how it started -- I bought Designer Style Handbags by Sherri Haab in my quest for inspirations for the silent auction. There are some really cute ideas in there, including some wacky decoupage techniques for cigar boxes -- stuff I'll never do, but it was fun to read about them. One purse was a simple bag crocheted out of 3/4-inch strips of fabric. The author points out that the print won't show on these narrow torn strips -- only the color matters. So, it's a good way to use up any oddball novelty fabric that's taking up room in your stash.

Oh....you mean like THIS?????

So a couple of hours later, here's what I had instead:

It's lined with muslin, so it certainly is functional as a handbag. My only anxiety is that it might really look more like a grandmotherly potholder. And since I've been the most vocal advocate of the "no icky crafts" rule for the silent auction, I'd better get some opinions from trusted fashionistas at work tomorrow.

If it gets a thumbs-down, at least I'll know that -- on a rainy Saturday afternoon in August -- I finally got some use out of that enormous size-P crochet hook in my craft drawer!

Sunday, August 20, 2006

Getting ready for the silent auction

Next month, my department at work will host another silent auction to benefit local United Way agencies.

Last year was our first year to do it, and it was a big hit with other employees. They loved all the handcrafted items, along with other things reflecting the personal talents of our team. One of my co-workers contributed a beautiful handwoven basket with embroidered liner; she also brought a set of gorgeous wine glasses with hand-painted embellishments. We had painted boxes, crocheted afghans. There were certificates for rounds of golf, and for family photo shoots for holiday cards. I brought a couple of quilts and a knitted scarf. It was quite a kick for all of us to have other employees wander through the department all day, ooo-ing and ahh-ing over our humble creations and writing down bids that would go toward the United Way campaign. One woman's fresh-baked apple pies brought in $40 each!

With quilted purses and totes being so popular right now, I thought I'd try my hand at making some for this year's fundraiser. I'm having so much fun! Here are a couple that I've completed so far.

I'm not sure I'm crazy about the embellishments, but I'll keep fiddling with them. In the meantime, it's fun to have little easy-to-complete projects to cross off the list.

Friday, August 18, 2006

It'll keep you in stitches

My recent unpacking of stuff out of storage reunited me with one of the best knitting resources I've ever had: Barbara Walker's Treasury of Knitting Patterns. If you like to knit, it's absolutely worth the investment.

First published nearly 40 years ago, this book -- all 300 pages of it -- has straightforward, easy-to-understand instructions for hundreds and hundreds of different knitting stitches. And lest you feel overwhelmed by the choices, make note what the author wrote in the forward in 1968:

"...suppose that you are a novice knitter or one who has done only 'plain knitting ' for years and imagines that 'all that fancy work is too complicated.' It is important, then, for you to realize that many of the most attractive patterns are astonishingly simple to do. All the pattern stitches in this book can be done by anyone who knows just four basic knitting operations: how to knit, how to purl, how to make a yarn-over stitch and how to use a cable needle."

True to her word, Ms. Walker keeps everything easy. She organizes the stitches into basic categories - from simple knit-purl combinations and color-change patterns to eyelet patterns, fancy-texture patterns, cables and even lace.

Her brief commentary on each stitch (and ways to use it) is both helpful and charming. Few of us will probably be knitting the lace gloves or winter suits she sometimes mentions. But it's great to know which stitches are reversible, have little elasticity (or a lot), or feature "a pleasing texture of horizontal corrugations," as she writes about the Roman Rib Stitch.

In fact, the Roman Rib stitch worked out nicely on the little blanket I knit last week as Dan and I drove to Cincinatti and back. I'm so glad to have this book close at hand again!


To double your fun, check out the Second Treasury of Knitting Patterns, too. Both are classics, and you'll never be at a loss for knitting inspiration again.

Saturday, July 29, 2006

Helen's cap: It's tried and true!

I got an e-mail from the volunteer director at the hospital on Thursday afternoon. The cancer treatment center was in need of more caps for chemotherapy patients -- did I have time to make some?

As any volunteer crafter knows, it's easy to snap into action when you get a request like this!


So Thursday after work, I poked around in my stash for some appropriate fabrics and found some long-forgotten half-yard lengths of cotton "blender fabrics" that I'd purchased a couple of years ago. For some reason they never seemed to lend themselves to any of my quilting projects, but they were absolutely perfect for chemotherapy caps - soft tone-on-tone motifs in pretty, flattering pastel shades. I had numerous other half-yards also suitable for caps, so I was good to go.


Friday night I cut out a dozen caps using Helen Littrell's wonderful pattern ...and here are the results of just a few hours at the machine this afternoon:


These caps don't look like much just piled up like this - I think I need to get a mannequin head to photograph them more appropriately. But Helen's Cover Cap design is the hands-down favorite among patients here. And, as I've written before, it goes together quickly and easily.

Tomorrow's agenda includes painting woodwork in the upstairs hallway and stairwell -- with a mid-afternoon break to drop the bag of caps off at the hospital.

Tuesday, July 25, 2006

A most enjoyable stitch

I usually rely on the good ol' seed stitch when it comes to knitting winter scarves -- sometimes adding a section of ribbing in the middle so it molds nicely around the neck. Nothing wrong with it, but I felt (gasp!!!!!) a bit of rut coming on.

Then last week, I was visiting a new yarn shop. I saw a great scarf on display with handwritten instructions for the very simple stitch pattern pinned to it. As the friendly clerk was ringing up my yarn purchases, I asked if I could copy down the pattern, and she cheerfully encouraged me to do just that.

It's been too hot to work with the handspun wool I bought that day, so I tried out the new stitch on some of the Caron Simply Soft I seem to have in abundance. I started fiddling around and changing the pattern a little -- and came up with something that instantly pulled me out of my seed-stitch rut. It's good-looking, reversible, and knits up in a flash! I've only done a few inches so far, but I think it'll be perfect for next January's Red Scarf project.


I'm sure there's a name for this stitch somewhere - surely Barbara Walker has long since documented this one - but I couldn't find the official name for it, so I will simply refer to it as the Enjoyable Rib stitch:

***

Enjoyable-Rib Scarf

Cast on 38 stitches on size 8 needles (or any multiple of four, plus 2 for edge stitches, using any size needle that suits your yarn.)

Slip first stitch; *K1, K2tog, YO, P1* till one stitch remains - K last stitch.

That's it. Repeat that same row, over and over, always being careful to slip the first stitch of each row. Keep going for 60 inches or so, and bind off in pattern.

***

My photo doesn't do the stitch justice - in a yarn with a little bit of sheen, the rib columns stand out beautifully and no one will ever believe it's so wildly simple to do. Have fun with this -- I promise you'll find it very enjoyable, too!

Sunday, July 23, 2006

Feeling warm and fuzzy on July 23

This is a special day in my family. My sisters and brother and I exchanged e-mails about it first thing this morning. We always do. We share a few sweet memories, expressions of thankfulness. One of my sisters observes the day each year by making a peach pie. Me, I buy flannel.

July 23 is our mother's birthday, and this year she would have been 89. Today marks the fifth July 23 we've observed without her.

Within a year or so after her death, my siblings and I found ourselves observing Mother's birthday in our own special little ways. Simple little things that had been synonymous with our mother - playing bridge, or lovingly baking a pie in a well-worn tin -- became an appropriate way to quietly observe the special day.

So while going to the fabric store is hardly an uncommon event for me, it's always different -- and very wonderful -- every July 23. This day is when I buy flannel for receiving blankets - the same kind my mother used to make -- that will go to babies who need them. I posted the instructions on how to make them here a few months ago.

It may be weeks or months before I actually get these simple little blankets sewn up and taken to the hospital, but for some reason it's been important to me to buy the flannel on my mother's birthday. So, once again - that's exactly what I did today. I took my time, picking out sweet prints and soft textures that I knew Mother would have loved. Then I came home and put it all through the washer and dryer so it'll be ready when the mood strikes.


So that's why I'm feeling warm and fuzzy this July 23. Not a day goes by that my sisters and brother and I don't miss both of our parents. But we're grateful that small things keep us close, that our parents' example is living on in new generations of the family, and that the memories make us smile.

And what would Mother say if she knew I were writing about her on a web log? She'd smile, hold her hands up in that "don't-even-bother-trying-to-explain-technology to me" gesture, and say, "Oh, you kids and that Internet!"

If there's a special birthday or anniversary in your own family, I hope you have a precious way to observe it, too.

Monday, July 10, 2006

Seeing red (but in a good way!)

There's a lot I'd like to accomplish over the next six months. Paint the living room. Design some wonderful perennial beds for the back yard. Exceed all my objectives for the year at work. Lose 20 pounds. Read some classic literature.

And I know if I'm going to complete any of these things, I've got to make progress in small steps along the way. None of these goals are suited to last-minute rushes at the end of the year!

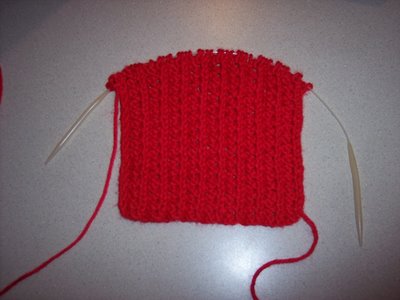
Same goes for another goal I'd like to meet come January: Contributing to a wonderful project to encourage young adults attending college with little or no family support. It's called the Red Scarf Project.

When I first read about this program a couple of months ago, I couldn't get it out of my mind. It's a little involved, but here's the background.

As many as 13,000 young people who have come out of foster care are attending college each year. And according to the Orphan Foundation of America, these kids are remarkable success stories. They represent only 10 percent of former foster kids who make it past high school - and they do so through their own talents, determination, and a lot of scholarship support from organizations like the OFA.

This sort of grit and focus on success -- even when nobody expects you to -- is awe-inspiring. But the OFA knows that while these kids need financial support, they can benefit from a little moral support, too.

Now...Remember getting care packages in college? Those wonderful, unexpected parcels filled with chocolate chip cookies, funky socks, quarters for the laundry, and notes from home? They usually arrived magically, just when the pressure of classwork seemed overwhelming - and they never failed to provide just the necessary encouragement to hang in there. But if you have no family at home - if you're truly on your own -who's going to send you a care package? Who's going to give you that little boost of confidence from knowing that somebody really cares about you?

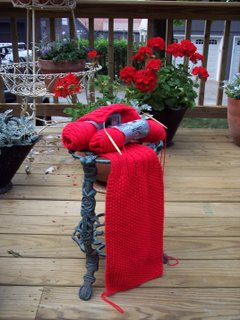
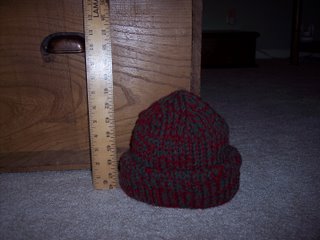
Twice a year, the Washington D.C.-based OFA does its best to fill that need for thousands of former foster kids who've gone on to college. In the fall, they organize members of Congress and other government staff to pack care packages for kids all over the U.S. And for Valentine's Day, they send another boost in the form of a warm, handmade red scarf.

Want to get involved? Just make a scarf and in January, mail it to the OFA. All the information you need is right here. And if you're near an Einstein Brothers Bagel shop, you can drop off your scarves there -- again, only in January.

The OFA will take care of mailing your scarf with a message of encouragement to a college student in time for Valentine's Day.

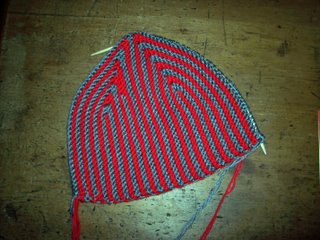
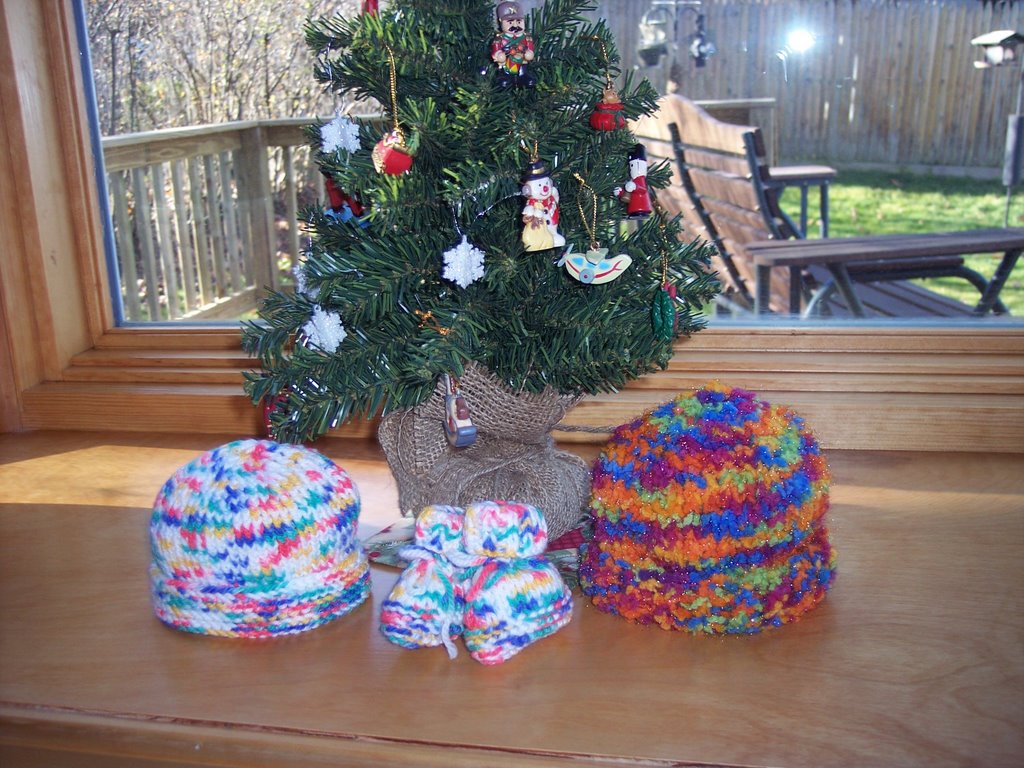
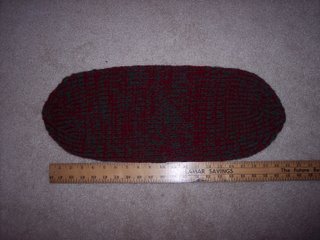
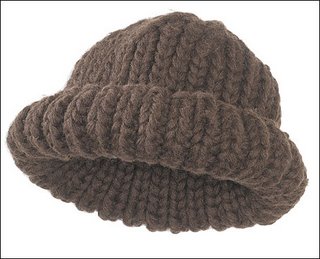
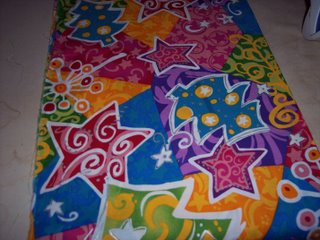
The OFA Web site gives a few guidelines for the scarves - about 60 inches long, soft, and preferably red, but any unisex color or style will do. Here are some good pattern ideas, too. (I'd stay away from the FunFur types - think warmth, not fashion.)

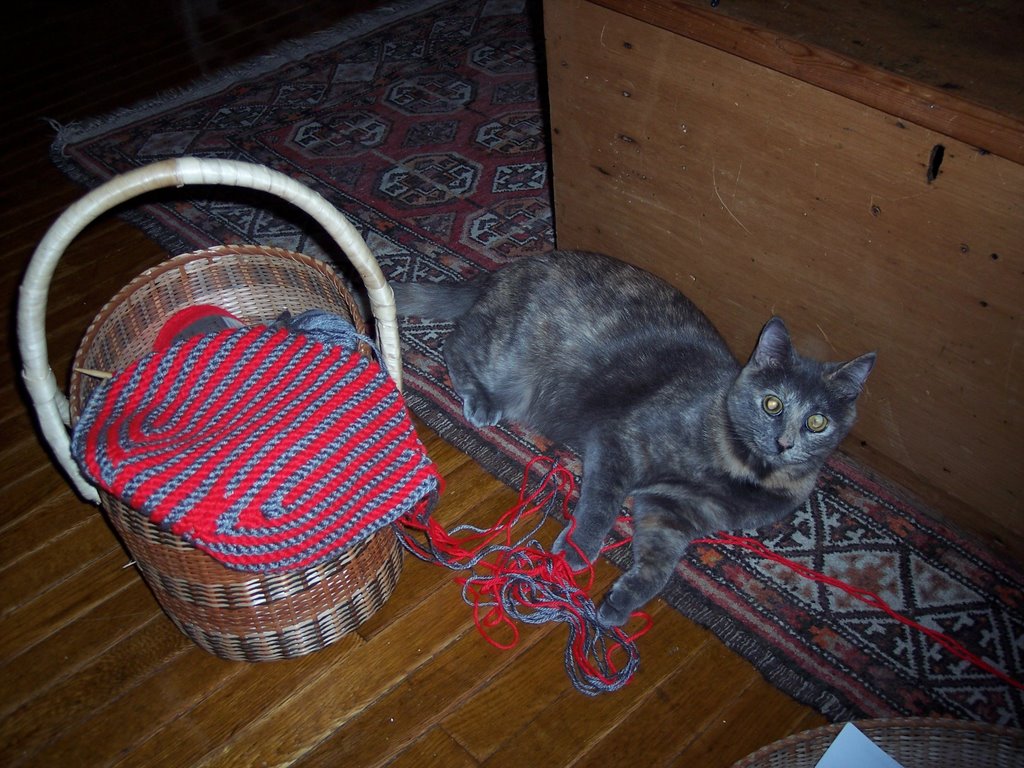
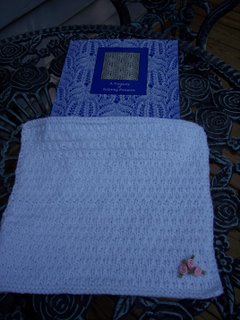
So why not dig through your stash, find your red yarn, and take advantage of some relaxing summer evenings by knitting a scarf? I'm keeping mine in a basket in the TV room and pick it up for a few minutes here and there....and it'll be done in nothing flat, with plenty of time to start a few more before January's mailing (and still paint the living room and plan next spring's flower beds.)

Oh, if only it were so easy to lose 20 pounds by year-end, too!!!

Sunday, July 09, 2006

A tiny bit of comfort, part two

I was so touched by all the comments on last week's post -- both those left here and those in private e-mails. Thanks so much to all for sharing your thoughts and experiences about neonatal bereavement items. I thought I would post a follow-up and answer a couple of questions.

Regarding sizes - Newborns in Need has a good chart to show approximate preemie measurements at various weeks of gestation. This can help give you a sense of how tiny some of these little ones are, and help you judge sizes for gowns and wraps.

And if you'd like to use a pattern, some of the best I've found are on the Bridging People and Places site. Here are some I finished this weekend:


These gowns are all less than nine inches long, made from the small-size infant pattern on the link above. I used the option that allows for a little gathering at the neck. It's important to leave the back of the gown completely open - just add some ribbons so it can be tied closed. These fragile little babies can only tolerate the most gentle of handing, and an open-backed gown allows them to be carefully dressed without damage.

Several people asked about sizes for bereavement blankets. They can be as small as 9 or 10 inches square, or up to about 24 inches square. Here's a quilt I just finished that I'll take to the hospital with the rest of these things tomorrow. If you'd like to make a blanket but aren't sure where to start, try knitting or crocheting one in any pattern using soft, pure white baby yarn -- maybe adding a small satin bow in pink or blue in one corner.

On the pattern link above, you'll also find some instructions for tiny pouches. The hospitals use these for very early losses, since these babies are often too small and fragile to be dressed at all. On this one, I put an extra layer of batting at the top to form a tiny pillow. The plaid lining makes for a sweet look. This one is made out of cotton quilt fabric, but I always think a flannel lining is an especially nice touch, too.

I hope these couple of posts have helped inspire some ideas for you as you consider crafting projects that really fill a need. Your local hospital volunteer department will be able to give you some more specific ideas, too. I've found that, while many hospitals have lots of volunteers to make baby hats and other happy items, there aren't many who make bereavement items. Please consider filling this need in your area. And thanks again for all your comments.

Saturday, July 01, 2006

A tiny bit of comfort

Last weekend's road trip brought some wonderful, long stretches of time to reflect, talk with my husband about everything under the sun, and of course, to knit for miles and miles. Unfortunately I forgot to bring a crochet hook like I'd planned, but I had a couple of sets of size five needles and some lightweight yarn to make a few baby things.

After finishing a couple hats and a pair or two of booties, I wanted something a little bigger to focus on, so I cast on as many stitches as my needle would hold - in this case, 60 -- and started the old standby basketweave pattern. It's simple: a few rows of garter stitch base border, and then a K 5 (for side border), followed by P5, K5 until the last five stitches. It doesn't matter if you end with a P5 or a K5; just K the last five stitches to establish the other side of the garter stitch border. Do this for five rows, purling in the Ps and knitting in the Ks...then switch, and knit in the Ps and purl in the Ks, repeating this for another five rows. You get the idea. It works with any set of stitches in multiples of 5.


So this was what I did along I-86 in western New York, using a white Wool-Ease with royal blue flecks in it. And by the time we passed Jamestown it was pretty evident that the piece of knitting emerging from my needles would be too small for even most preemie babies - so it would become a bereavement blanket. Which brings me to the point of this post.

We all know that most babies are born healthy and happy -- but some, for any number of reasons, don't make it. About five years ago, when I first got involved in service projects, I realized that many hospitals do have a need for tiny gowns, wraps and blankets for little ones whose parents can only hold them briefly before saying goodbye to them. I learned that in the absence of a size-appropriate wrap, the only thing the hospitals can give these grieving parents is a receiving blanket sized for a full-term newborn...and the irony of wrapping their tiny, fragile baby in a blanket that's far too large only sharpens their sense of loss.

I learned that there were many, many volunteers out there who trade patterns and ideas for these items. And I 've since learned that, when a nurse or a hospital social worker can bring an appropriately-sized blanket or gown to a grieving parent, they feel a tiny bit of comfort in the midst of their heartbreak. That comfort may only last a moment, but it's there.

There are many names for these small items - burial gowns, blessing garments, angel wraps, etc. etc. Hospitals tend to refer to them as "bereavement" items. Call them whatever you like...but if you can make them, please consider doing so.

Some volunteer crafters, perhaps because they've been through a painful loss themselves, can't bring themselves to make these tiny items, and that's OK. But if this is something you can do, I think you'll find it to be a very special experience. I started making them years ago out of a sense of thanks for all the big, healthy babies that my family has been blessed with. Rather than being a sad chore, it brings -- at least for me -- a grateful reminder of these blessings, and a sense of quiet responsibility to those who may be going through a loss.


As with all special-needs projects, contact your local hospital for guidelines and items they may need before you make them. If the words don't come easily to you, just ask the volunteer office about their need for neonatal bereavement items, and they'll know what you mean. In general, though, think soft and small-scale -- a heavy yarn can make a tiny baby seem even more fragile.

There are some good links out there for other items to knit, sew and crochet. I invite you to let me know of your own experiences with this very special service work.

Wednesday, June 21, 2006

Amazing what you'll find

Well, I'm back to blogging after a month and a half of painting, cleaning, packing, moving, unpacking, settling in, and waiting for the cable guy to come hook up our home Internet access. I've been doing a little knitting during the downtime, but I only got my sewing machine up and running a few days ago. So I'm feeling human again - and I know I'm really going to love our new house, and especially my new sewing room.

With most of our stuff in storage for the past six months, it was actually kind of fun to unpack and rediscover it all. I found a number of things I'd made for donations but had packed away during our temporary stay at the apartment. I had completely forgotten about them. The knitted hats for the local youth center will wait till this fall, but I'm anxious to get this baby blanket and a few others to the hospital in hopes they can be put to use.


This looks rather garish in the photo, but it's actually a pretty cheerful blanket that I think would appeal to a little kid. The yarn's from the Red Heart Kids line and I think it's called "Crayon." And the crochet pattern isn't really much of a pattern at all. Start with a base chain in any multiple of three, and then: sc, hdc, dc - those three stitches, over and over. Turn and repeat: sc, hdc, dc. In this and in each subsequent row, you'll be making an sc in a dc; an hdc in an hdc; and a dc in an sc. A lovely textured pattern will emerge before your eyes.

This blanket is about 36 inches square, and I can't remember how long my base chain was, but it's pretty easy to eyeball.

This is the blanket pattern (or, non-pattern!) that I fall back on every time I feel like crocheting and don't have anything particular in mind to do. It always turns out great, whether it's in a pale baby-weight acrylic or a double strand of wool. Sometimes for variety, I change the stitch sequence to sc, dc and trc -- which creates a more dramatic texture - but the basic idea is just the same. Occasionally I also make a few rounds of sc around the whole thing to finish it off, and a row of shell stitch looks nice, as well.

Dan and I are leaving for a five-day road trip tomorrow after work - so as I'm packing later tonight (oh, who am I kidding, it'll be tomorrow morning!) I think I'll toss some yarn and a crochet hook in my basket so I can get started on another one. Now that my yarn's emerged from storage, too, my stash is a really fun place to shop!

Sunday, April 30, 2006

An awfully cool way to help


Ever hear of cool ties? I discovered them a few years ago through The Ships Project. They're narrow cotton neck bands with sewn-in pockets containing tiny water-absorbing crystals. The ties are extremely popular with the ground troops the project supports. You soak them in water, and the crystals puff up and stay that way for hours. The slow evaporation creates a micro-cooling system when tied around the neck. Now, I can't imagine anything making the Iraqui desert a comfortable place to be...but if these cool ties can give even a bit of momentary relief, they're well worth doing.

You'll find some first-hand comments about these cool ties on The Ship's Project Web site -- and the photos showing troops with the project's knitted caps, are wonderful, too.

The project sends hats to the ships year-round, but really kicks up the shipments of cool ties for the ground troops this time of year. The ties I finished today are pictured above - in the fabric with that flame motif, that I really don't get at all (does it have something to do with Harleys? NASCAR?) -- but at least it does look quite guy-like, and was more fun to work with than the drab tans and grays I've done in the past. A yard and a half of fabric is enough for a full dozen ties. The Watersorb brand of crystals are available online - I got a similiar product yesterday in the plant department of Home Depot.

Here's the cool tie pattern - very simple and easy to follow.

As for the hats that will go off to the project this week, here they are - two modified Tychus caps (oh, how I love that pattern) and a third from my "mistake" pattern for caps with a seed-stitch cuff.

I've got another Tychus on the needles right now - so, think I'll get to it and see if I can stay awake for "Grey's Anatomy" tonight!

Tuesday, April 25, 2006

Sewing in the country


I went to my first quilt retreat last weekend. It was so much fun! Two days and two nights at a rustic retreat center outside of town, along with 13 other guild members. Naturally, I overpacked for the occasion - not with clothes or shoes, but with fabric. I had about 16 yards of flannel pre-washed and ready to be made into receiving blankets, and a number of pieces of bright cotton prints for chemotherapy caps. They were both quick projects, easy to fit in between piecing quilt blocks. 
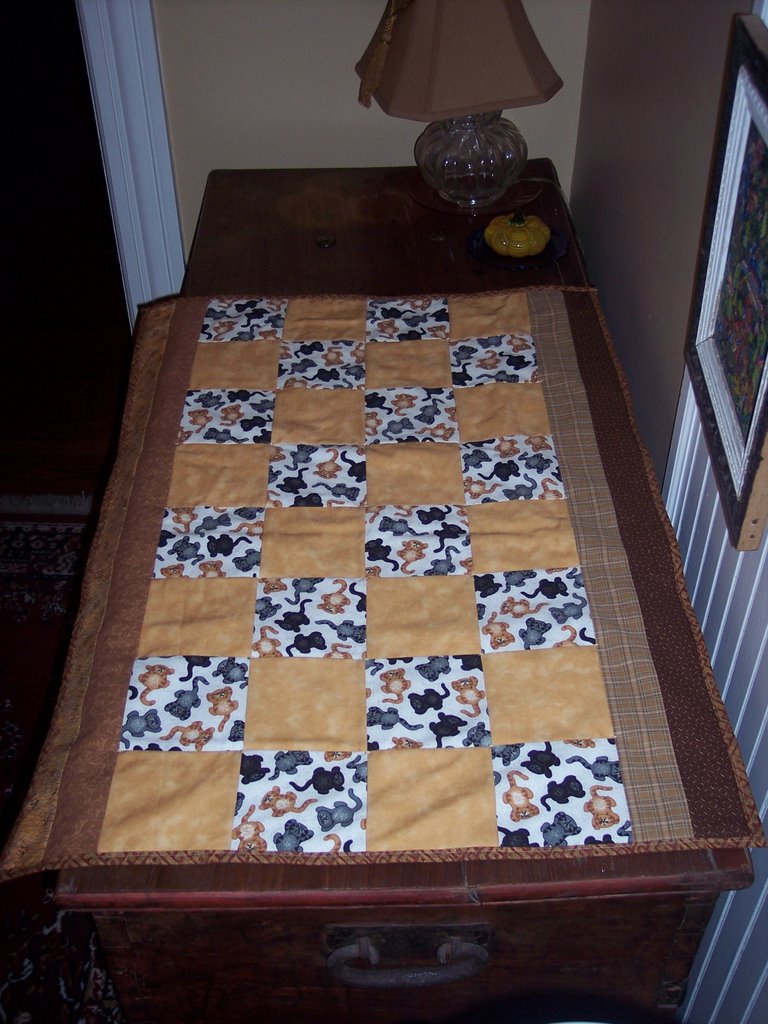
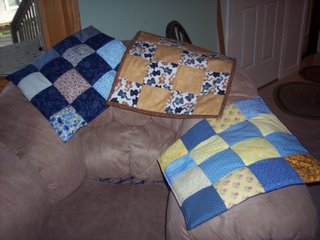
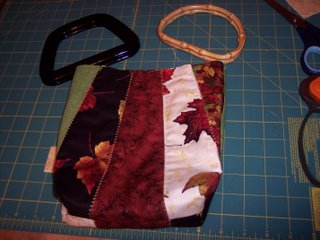
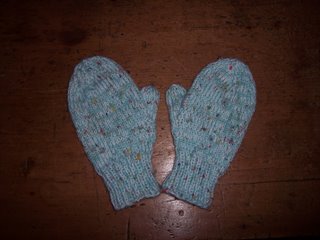
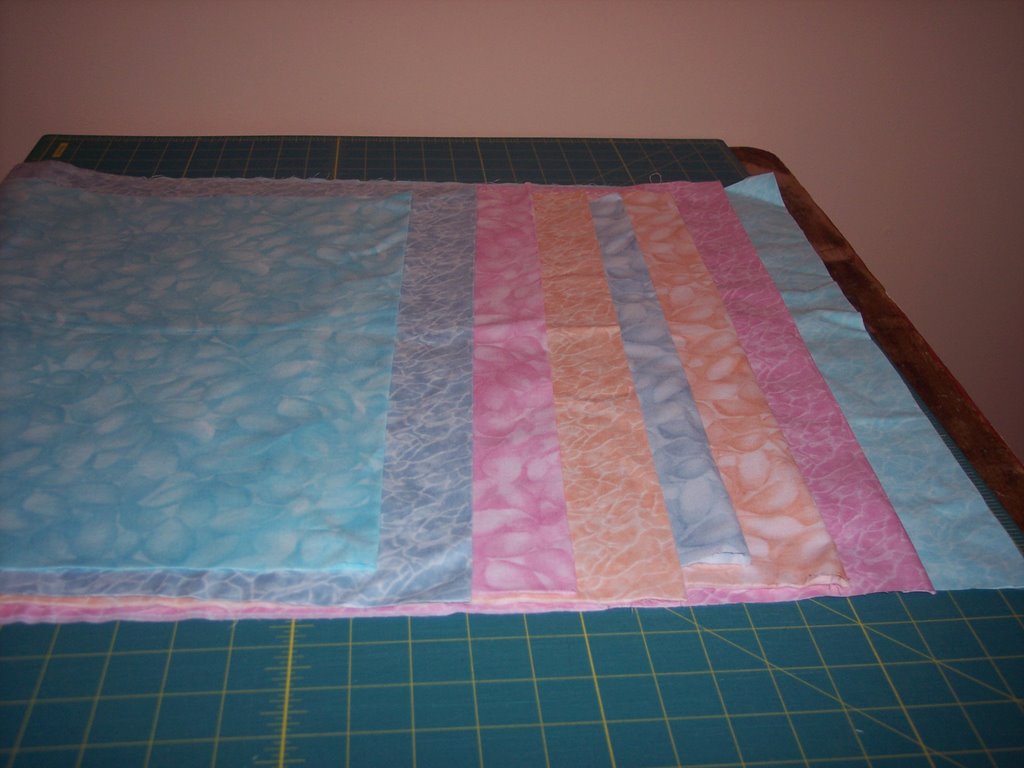
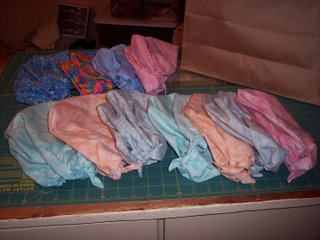
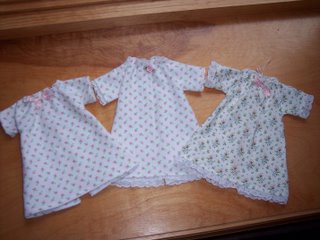
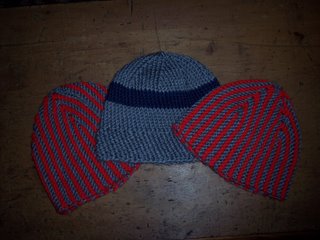
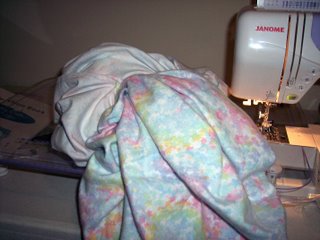
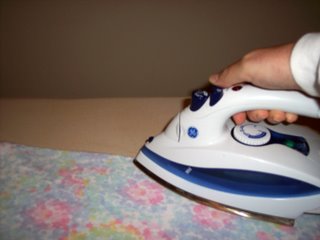
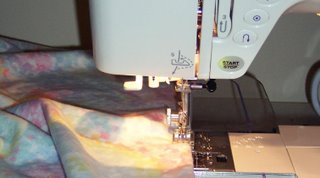
It's fun to stretch and try new, challenging patterns, but it's often great to fall back on the familiar, easy projects, too -- especially when surrounded by laughter, conversation and late-night pizza. I'm glad these service projects could be part of a memorable quilting weekend.

Sunday, April 23, 2006

Enjoying Tychus again

The pattern-fiddling worked! Even with my one-size-too-large needles, the adjustments on the Tychus instructions yielded a well-proportioned cap with a lively look. It was fun to experiment with the short rows, and the cap knit up quickly. The holes at the turning points didn't seem to be an issue this time, either - I did wrap the turned stitches, which helped. So I feel much better about it now. It's going into the mail next month to The Ships Project.

I'm going to try to get another knocked out, making this next one just a tiny bit longer. I made this one across 28 stitches - think I'll add two or three when I cast on again this evening. That's one thing I love about knitting - it's just so easy to rip things out and start over again, with nothing wasted, no harm done. Tychus is back in favor once again!

Monday, April 17, 2006

Not enjoying the Tychus cap

Well, it was my own darned fault for not doing a gauge swatch. When I finished the Tychus cap last evening during "West Wing," it (the cap, that is) seemed a little large to me - in fact, it seemed a lot large. I tossed it over to my husband, who's got the sort of noggin you'd expect from a fellow who's six-foot-eight tall. And, while he truly does look adorable at all times, this cap was ridiculously big, even for him. And if it didn't look good on my husband, I'm not about to pawn it off on a Marine who's serving his country and needs to keep his ears warm.

(I was disappointed with how this cap turned out, but not nearly as disappointed as I was with the new West Wing episode. The promos indicated there'd be a full-out tribute to the late John Spencer and his character, Leo McGarry. Not so, apparently. The episode was OK, but not the cry-fest I had anticipated. And I had my Kleenex all ready. Sigh. )

Anyway, with the finished Tychus being of such gargantuan proportions, I ripped out the whole thing and wound it back into tidy balls by the time "Desperate Housewives" was over.

However, I haven't given up on the project. The pattern is good, even if my gauge was off. I'm stuck with my size 10 circular needle since most of my other needles, except for DPNs, are in storage until we move into our house next month. But I think I can fiddle with the pattern enough to make it fit a normal-sized person, and skip the roll-up cuff while I'm at it.

So…off I go to cast on 28 stitches instead of 38, and to do short rows over 14 stitches instead of 18, thus eliminating eight rows from Tychus' garter-stitch girth. And hey! It's West Wing re-run night on Bravo!

Saturday, April 15, 2006

Enjoying the Tychus cap

I'm halfway though making another cap for the Ships Project. In a recent post to project volunteers, Ellen Harpin said that she won't be sending caps to the ground troops for a few months - no need for extra warmth in the Iraq desert these days - but the military serving on ships still have a need for warm hats, and they enjoy the brighter, more creative styles in their down-time. So I decided to use the Tychus pattern from Knitty. I've been admiring it for awhile, both for its attractive style and its use of short-row shaping. Here's how it looks so far:

I'm probably going to go in and do a little weaving on the inside of the cap - the turning spots on the short rows are creating some holes, but nothing that can't be easily fixed with a little surreptitious stitching. All in all, I really like this pattern. I'm aiming to get a few more done before the mailing dates in early May. I might adapt the row length to make it a little shorter, eliminating the need to turn up a cuff.

I used two strands of Caron Simply Soft (which seems to be my acrylic of choice these days) in gray and bright red. I've got some more dark blue to use up, too, so that will go into the next effort.

And of course, having four strands of yarn going at the same time is just too much for a little cat to resist. Turns out Abigail is much better at scrambling around with the web of yarn than she is at knitting - but if she had thumbs, I'm quite sure she'd give it a go...!

Wednesday, April 05, 2006

A great cap to sew

A few months ago, I was looking around for a good pattern for a chemotherapy cap to sew. Our volunteer sewing group at the hospital had a standing request from the cancer-treatment center to provide such caps. Problem was, most of the Internet patterns available are the stretchy turban styles that, frankly, aren't that attractive. And if you're sick and experiencing hair loss to boot, you shouldn't have to resign yourself to something really frumpy-looking.

There are some headwrap patterns available from the big pattern manufacturers, and I tried a few of those. Most involve multiple pattern pieces, elaborate lining, and tricky procedures to ease a full crown into a narrower band. I made one that took several hours to make.


Then I discovered a terrific pattern by Helen Littrell, a woman in Oregon who's earned considerable acclaim for her "Cover Cap" and other clever designs on her website. My photo doesn't really show it well, but the ties create soft folds along the sides that provide some flattering fullness around the face. A short elastic insert in the back helps create a custom fit. And, I kid you not, once you've made a few of these kerchiefs, you'll be turning them out at the rate of three per hour!

Our volunteer group has made stacks of these for the cancer center, and the nurses have reported that they fly off the shelves. We made lots of them in warm flannels during the winter months. I'm switching to 100% cotton for the summer months. A friend who's been undergoing chemotherapy and hair loss in recent months says the cozy ones are great for sleeping, and lighterweight fabrics are preferable for daytime wear.

Try fun, bright prints as well as darker, more conservative fabrics - people with cancer don't lose their personal tastes when they lose their hair, so offer them as much variety as you can when you're making a cancer center donation.

Even if you're accustomed to knitting caps for chemo patients, please consider giving this great sewing pattern a try, especially as we're moving into warmer weather. Helen charges a nominal fee for her patterns so she can keep her operation going. Her service is fast and friendly and the cap designs get an enthusiastic thumbs up from the folks who need them most. I'm sure you'll consider this pattern the best $5 investment you'll ever make!

Tuesday, April 04, 2006

You can almost smell the Baby Magic

Tonight was a good night to make one of the flannel receiving blankets I've had on my list. My mother used to make these snuggly blankets and my daughter had two of them as a newborn. In recent years, I've many happy memories of my mom while making similiar blankets. This particular one is for my niece Amy and the little one she and her husband are expecting this summer. They're great for hospital giving as well.

These are insanely easy to make and the process doesn't really need illustration, but I was in a mood to fiddle with photos tonight.

Each blanket takes about 2 1/2 yards of flannel. Be sure to wash it, because flannel really shrinks. Trim off the selvages, double the fabric, and square it up:


With right sides together, stitch all the way around the edge with a 3/8" seam. Leave an opening of six or seven inches:


Trim excess fabric from the corners and turn blanket inside out through the opening:

Press the edges:

Topstitch around, 1/4" from the edge. You'll stitch the opening closed in the process. This is a nice chance to use one of your machine's decorative stitches if you're so inclined:

You can whip one of these together in 20 minutes. Seriously.

These always make me think of wrapping up my daughter, all snug and cozy and clean, after her bath. And they make me remember how sweet my mother was to make those wonderfully cuddly blankets.

These aren't the show-stopping sort of blankets that will become family heirlooms and make people gasp in admiration. But they're useful, much more generously sized than purchased receiving blankets, and stand up to hundreds of machine washings.

Twenty minutes in the making - and a lifetime of snuggly memories.