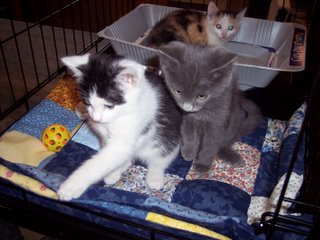
This goes to Carm today - just the right size for her cat carrier. The happy little cat print, I hope, will make a cheery backdrop for some kitties in need of a loving new home.


The SPCA likes 18-inch-square cushions for their cages at the shelter, so that's what I made. The cage Carm takes on her weekly road shows is a bit wider and deeper than that, but we stacked the the cushions up yesterday and little Charlie and Jimmy didn't mind one bit. Their sister Lily watched from a distance, but soon all three of them were snuggled into a comfy corner for a nap.
Carm's cage measures 20 x 30, and we both liked the idea of the cushion curling up on the sides, like a padded bumper in a baby's crib. So I'll make her a 24 x 34 cushion and her little fuzzy friends will have a cozy place to nap. Of course, these cushions will stand up to many machine washings, too.
If you'd like to make cage cushions for your local shelter, be sure and call to check their preferred sizes. Some shelters will accept knitted or crocheted blankets, but the fabric seems to make a tidier liner with no potential for snagging on little claws. The five-inch scrap squares work very well for a simple patchwork. I used a high-loft batting I had on hand, but you can use old towels or worn mattress covers, too, as long as they're clean.
I backed the cushions with some leftover home dec fabric for extra sturdiness. For the edges, you can do the right-sides-together, stitch-around-the-edges-leaving-an-opening-and-turn thing. Or, leave your backing about an inch larger than the top, and fold it over to make a binding, machine-stitching on the top side. Make machine bar-tacks at each corner of the patchwork - no handwork at all.
A quick and easy project -- and one that can really help some deserving animals feel cozy as they get a whole new lease on life.

I was in Barnes & Noble's last weekend, looking for a good book on felted knits. While I was hunting through the amply-stocked shelf of knitting books, another little jewel jumped into my hands instead:. "Knitting for Peace" by Betty Christiansen. Published just this year, it's a lovely compilation of ideas for community service crafting.
Not only does the author share wonderful profiles of many terrific organizations devoted to service projects -- she also includes all the sensible patterns we'll ever need. Simple, warm sweaters, vests, socks and classic hat patterns are all beautifully presented. I was happy to see The Ships Project featured, along with Warm Up America - accurately described as "the mother of all knitting charities."
"Knitting for Peace" is great reading and great inspiration at the same time.

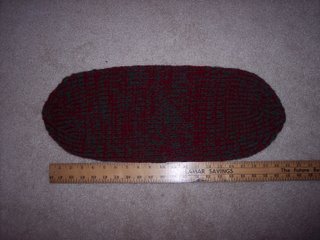
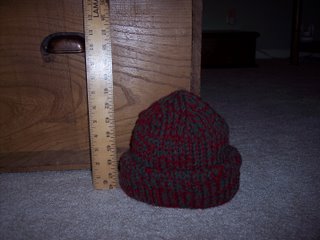
Then just punch one end in to fit inside the other. Tack the tops together if you want. Fold up a cuff, and you're done! (I did end up making a pom-pom for this one later, which was good mindless activity while watching the finals of Dancing With the Stars this week - way to go, Emmitt!!)

The interior of this hat measures about 19 inches around, but it's really stretchy - so it should fit almost any grade-school child or small adult with ease. Just add or subtract a few stitches to adjust the size. My gauge was 2.5 stitches per inch.
This hat is a great way to use up stash yarn in a hurry, and the results will warm your heart.
